Tuesday, July 21, 2026

Creating and Styling a Webpage Lab


Instructions

Creating and Styling a Webpage Lab

Introduction:

In this lab, you will create a personal webpage using HTML and CSS and then view it in a web browser using a local server.

Goal:

The goal of this lab is to create a personal webpage using HTML and CSS that includes an image, lists, headings, and a hyperlink. Learn to apply basic HTML structure and CSS styling.

Objectives:

  • Use HTML to structure a webpage, including images, lists, headings, and links.

  • Style the webpage using CSS to enhance visual appeal.

Instructions:

Part 1: Creating the HTML Document:

  1. Set up the basic HTML structure:

    1. Open the index.html file present under the SRC folder. This is where you will write your HTML code.

    2. Create the basic structure with <!DOCTYPE html>, <html>, <head>, and <body> tags. <!DOCTYPE html> <html> <head> </head> <body> </body> </html>

  2. Set the document title:

    1. Add a <title> element in the <head> section. Set the title to your name. <head> <title>Your Name</title> </head>

  3. Link to the CSS file:

    1. Link the styles.css file inside the <head> element. <head> <title>Your Name</title> <link rel="stylesheet" href="styles.css"> </head>

  4. Create divider elements:

    1. Add five <div> elements inside the <body>.

  5. Add your name as a heading:

    1. Add an <h1> tag inside the first <div> to display your name.

  6. Add an image:

    1. Insert an <img> tag in the second <div> to display photo.jpg. Assign an id of photo. <div> <img src="photo.jpg" id="photo" alt="My Photo"> </div>

  7. Add a heading for music artists:

    1. In the third <div>, add an <h2> for "Favorite Music Artists."

    2. Add an unordered list <ul> with five list items <li> naming your top five artists.

  8. Add a heading for films:

    1. In the fourth <div>, add an <h2> for "Favorite Films."

    2. Add an ordered list <ol> with five <li> elements naming your top five favorite films.

  9. Add a hyperlink:

    1. In the last <div>, add an <a> tag linking to your Facebook profile or https://www.meta.com/.

    2. Use "My Profile" as the link text. <div> <a href="https://www.meta.com/" traget="_blank">My Profile</a> </div>

Part 2: Style the Webpage Using CSS:

  1. Open the styles.css file present under the SRC folder. This is where you define your webpage styles.

  2. Style the image: Add a CSS rule for the image with id="photo".

    1. Set the border to 2px solid blue.

  3. Style the main heading: Add a CSS rule for the <h1> containing your name.

    1. Set its color to blue.

  4. Style subheadings: Add a CSS rule for all <h2> elements.

    1. Set their color to grey.

  5. Style the divider elements: Add a CSS rule for all <div> elements.

    1. Apply a margin of 4px.

Part 3: Viewing Your HTML Document in the Browser:

  1. Start the live server:

    1. At the bottom-right of the editor, click on the Go Live button.

    2. Once the server is up and running, you will see an exposed port number (e.g., 5500). This means your server is now live.

  2. Open the browser preview: At the middle-left of the editor, click on the Browser Preview button to open a new Browser Preview tab.

  3. Enter the URL in the browser: In the browser, enter the following URL format (replacing <exposed port> with the actual port number shown in the editor): http://localhost:<exposed port>

  4. Verify the created and modified webpage: Check that the webpage is created successfully, displaying the styles that you have applied to it.

  5. Close the server after completing the lab: Once you’re done with the lab, make sure to close the server to free up the port:

    1. Click on the exposed port number (e.g., 5500) at the bottom-right of VSCode.

    2. You should see a notification confirming that the server is now offline (stopped).

Key Takeaways:

  • HTML is used to structure content, while CSS styles the appearance.

  • Dividing content into sections with <div> tags helps organize a webpage.

  • Linking a CSS file allows for reusable and centralized styling.

  • Setting attributes like id enables targeted styling in CSS.

Final Step: Submit Your Code:

  • Go to File > Save to ensure your work is saved.

  • Submit your assignment: Click the "Submit Assignment" button in the Lab toolbar.

    • Your code will be autograded and feedback will be available shortly on the Grades tab.

Coursera Questions on Front end development - CSS


Instructions

Styling an HTML Page with CSS

Introduction:

In this lab, you’ll style an HTML page using CSS. This lab will help you understand how to apply styling rules to elements using various selectors like element, class, ID, and descendant selectors.

Goal:

The goal of this lab is to help you practice applying CSS styling rules to an HTML document. By the end of the lab, you will gain experience using various CSS selectors to style elements and improve the visual presentation of a restaurant menu page.

Objectives:

  • Define and apply CSS styling rules using element, ID, class, and relationship-based selectors.

  • Align text and center an image using CSS properties.

  • Use specific colors and font sizes to highlight content on the webpage.

Instructions:

Note: To make sure your work is graded correctly, use the selectors and property values exactly as shown in the instructions. Avoid combining selectors into one rule, and use the specific property names listed for each step.

Part 1: Style the HTML Page Using CSS:

  1. Open the styles.css file present under the PROJECT folder. This is where you’ll add all the CSS rules for styling the HTML elements on the page.

  2. Set the background color for the body element: Add a CSS rule for the body element and set its background color to #E0E0E2. This will add a light gray background to the entire page.

  3. Style the main heading (h1 element): Add a CSS rule for the h1 element to set its text color to #721817, a dark red, to make the main heading stand out.

  4. Style the subheadings (h2 elements): Add a CSS rule for the h2 elements to set their text color to #721817, the same color used for the h1 heading, for a cohesive look.

  5. Center-align text with the .center-text class: Add a CSS rule for the .center-text class to align any text within elements using this class to the center.

  6. Center the logo image using the #logo ID: Add a CSS rule for the element with the ID logo. Set its left and right margins to auto and change its display property to block to center the image horizontally.

  7. Style the span elements inside the h2 headings: Add a CSS rule using the selector h2 > span. This selector targets span elements that are direct children of h2 elements. Set the text color to #FA9F42 and the font size to 0.75em to make the NEW labels distinct.

  8. Style the copyright text using the #copyright ID: Add a CSS rule targeting the element with the ID copyright to set its top padding to 12px for spacing. Also, set the font size to 0.75em for a smaller, more subtle appearance.

  9. After successfully modifying the styles.css file, navigate to File > Save to save changes in the file.

Part 2: Preview Your Styled Page:

  1. Start the live server:

    1. At the bottom-right of the editor, click on the Go Live button.

    2. Once the server is up and running, you will see an exposed port number (e.g., 5500,5501, and so forth). This means your server is now live.

  2. Open the browser preview: At the middle-left of the editor, click on the Browser Preview button to open a new Browser Preview tab.

  3. Enter the URL in the browser: In the browser, enter the following URL format (replacing <exposed port> with the actual port number shown in the editor): http://localhost:<exposed port>

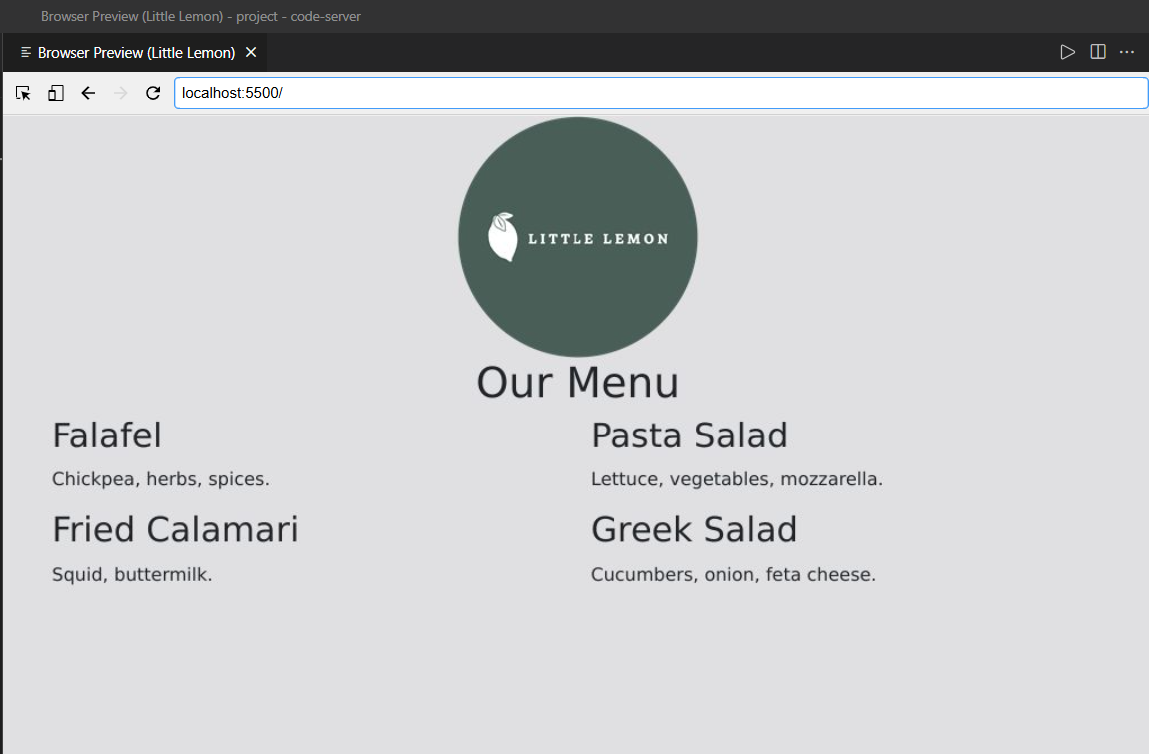
  4. Verify your styles: Check and verify that the webpage displays the updated styles, including background color, text alignment, font color, and size.

  5. Close the server after completing the lab: Once you’re done with the lab, make sure to close the server to free up the port:

    1. Click on the exposed port number (e.g., 5500,5501, and so forth) at the bottom-right of VSCode.

    2. You should see a notification confirming that the server is now offline (stopped).

Key Takeaways:

  • CSS enables precise control over the appearance of HTML elements through various selectors and properties.

  • Different selectors, such as element, ID, class, and descendant selectors, allow for targeted styling based on the type and location of HTML elements.

  • Aligning elements, setting colors, and adjusting font sizes contribute significantly to a webpage's visual structure and user experience.

Final Step: Submit Your Code:

  • Go to File > Save to ensure your work is saved.

  • Submit your assignment: Click the "Submit Assignment" button in the Lab toolbar.

    • Your code will be autograded and feedback will be available shortly on the Grades tab.


Creating and Styling a Webpage Lab

  Instructions Creating and Styling a Webpage Lab Introduction: In this lab, you will create a personal webpage using HTML and CSS and then ...